Most folks will tell you „get a tripod“. We will get to this later but I prefer shooting handheld. First you need enough light – the more the better. You can use any light source you want but be sure to have as much of light as possible.
Problems with wrong focus
Most common problem is wrong focus. Tripod will not help, it often makes it even worse. The problem is that the picture is sharp enough but not where you want. So first make sure where you focus exactly.
On the left is typical example of wrong focus. Main crystals in the front are out of focus but the background is sharp. This is typical result of trying to focus too close. Picture on the right is properly focused with main crystal group in focus. Check large pictures to examine all details.
The most simple system is this: Point your camera on the spot where you want to focus, press the release half way, recompose as you need (with still halfpressed release) and then fully press the release. You can move to the sides but avoid moving in front-back direction. It needs some practice but this is basic step. In case you camera has many focus point or areas, turn them all off except the center. Sometimes camera gets fooled and uses side focus points instead of center and you get blurry mineral and sharp bacground. Many people (especially with smartphones!) also try to focus from too short distance and camera automatically focuses as close as possible. This also produces blurry mineral and sharp background. Facebook is full of such pictures.
Problems with blurry images
In this case we have whole image soft or fuzzy. This is because of using too long shutter speed. You need to keep your shutter speed 1/focal length or faster. So if you have e.g. 100 mm macro lens, you need 1/100 or faster shutter speed to avoid fuzzy images.
The picture on the left is typical example of serious motion blur. This happens if your shutter speed is too long to hold camera in your hands. Get more light or use tripod to fix the problem. I’ve used the tripod and the picture on the right is sharp enough.
There are several solutions to this problem. Open aperture (smaller number), raise iso, use tripod or get more light. The easiest way is to get more light. If you can’t, use tripod. If both of these are impossible, then raise ISO and lower the aperture. However raising iso produces more noise and lowering aperture reduces depth of field so use these 2 as the last options.
Using tripod
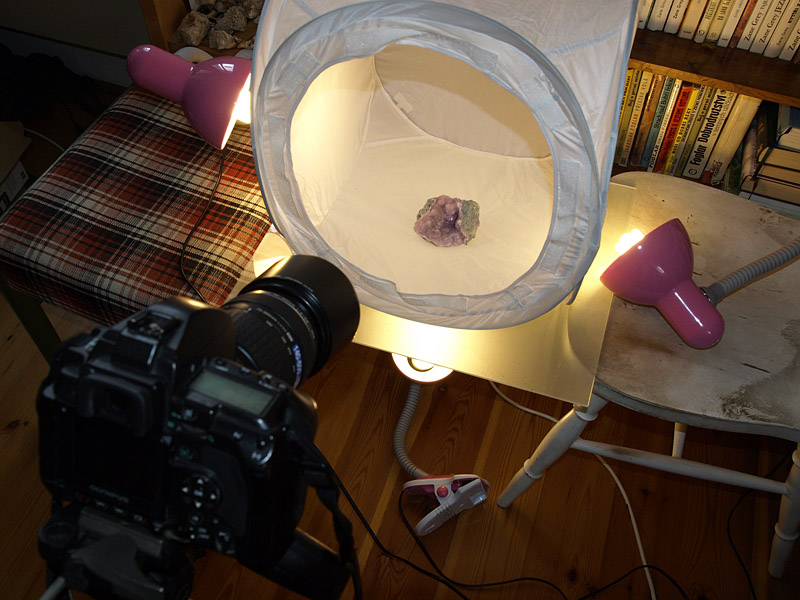
In case you do not have enough light, you can use tripod to stabilise the camera. This allows you to use high aperture to get enough depth of field and you don’t have to worry about shutter speed. Tripod is usually necessary for studio work or if you have some serious macro equipment attached. Also UV photography requires tripod.
Pictures above show some examples where tripod is a must. Serious macro setups for big magnification and shooting in light tent require tripod.
I recommend buying some solid tripod instead of some plastic shaky things. Once your camera is attached on it, you need some vibration-free way to release it. Cheap option is to use a self timer (at least 2 seconds), pros usually use cable or remote (IR) release. If you have a DSLR turn the mirror lock-up on.


Leave a Reply